Acquire Permissions to Control a Mac
Starting with 10.15 Catalina, macOS requires all remote control providing applications like Remotix Agent to have a whole variety of special rights to control the computer. Without this, you will NOT be able neither to view the remote computer’s screen, nor to control it, nor to access it unattendedly.
Once you launch Remotix Agent on a Mac, it will check if it has these rights and will ask you to grant the permission if needed:
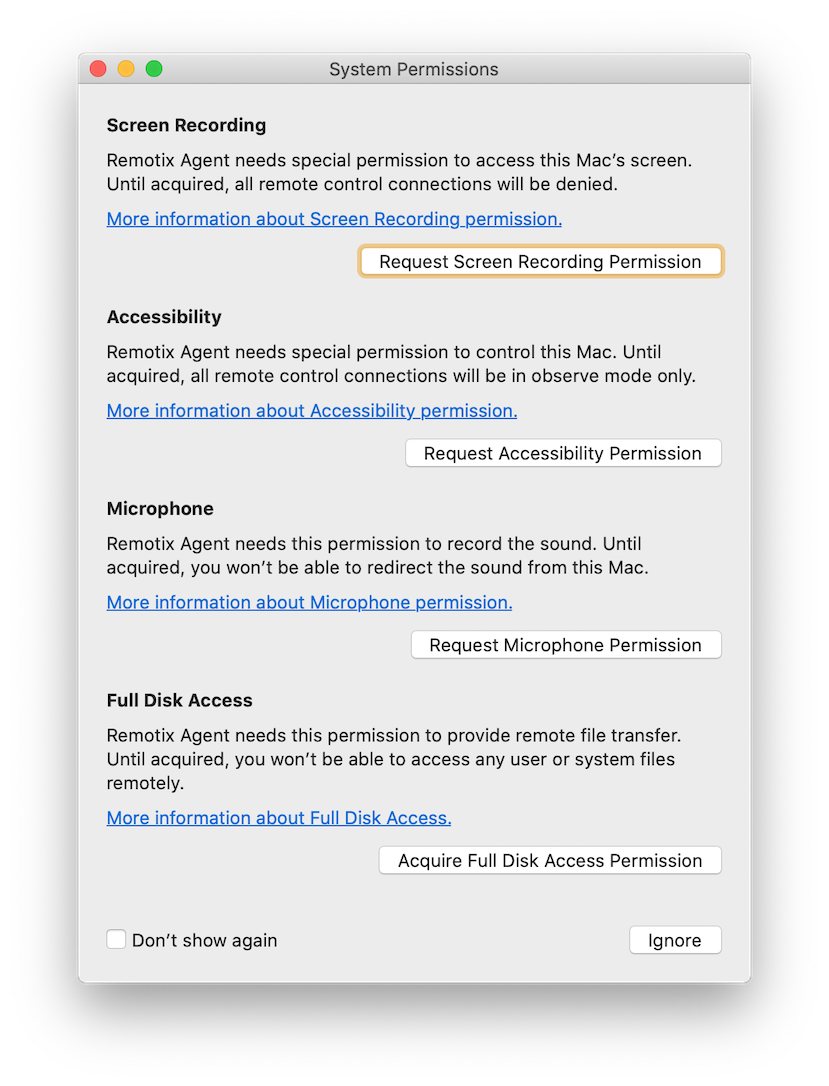
If no dialog emerge when you click the buttons, you have most likely previously denied to give the permission, or ignored an appeared dialog. If so, please see how to change your mind.
Screen Recording Permission
To make your Mac available to be observed remotely with NEAR, do as follows:
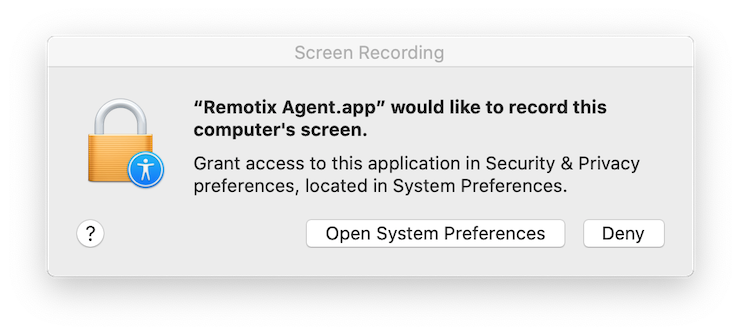
- When asked for permissions, click the «Request Screen Recording Permission» button that will open a system dialog.
- In the Screen Recording dialog window, click the «Open System Preferences» button:
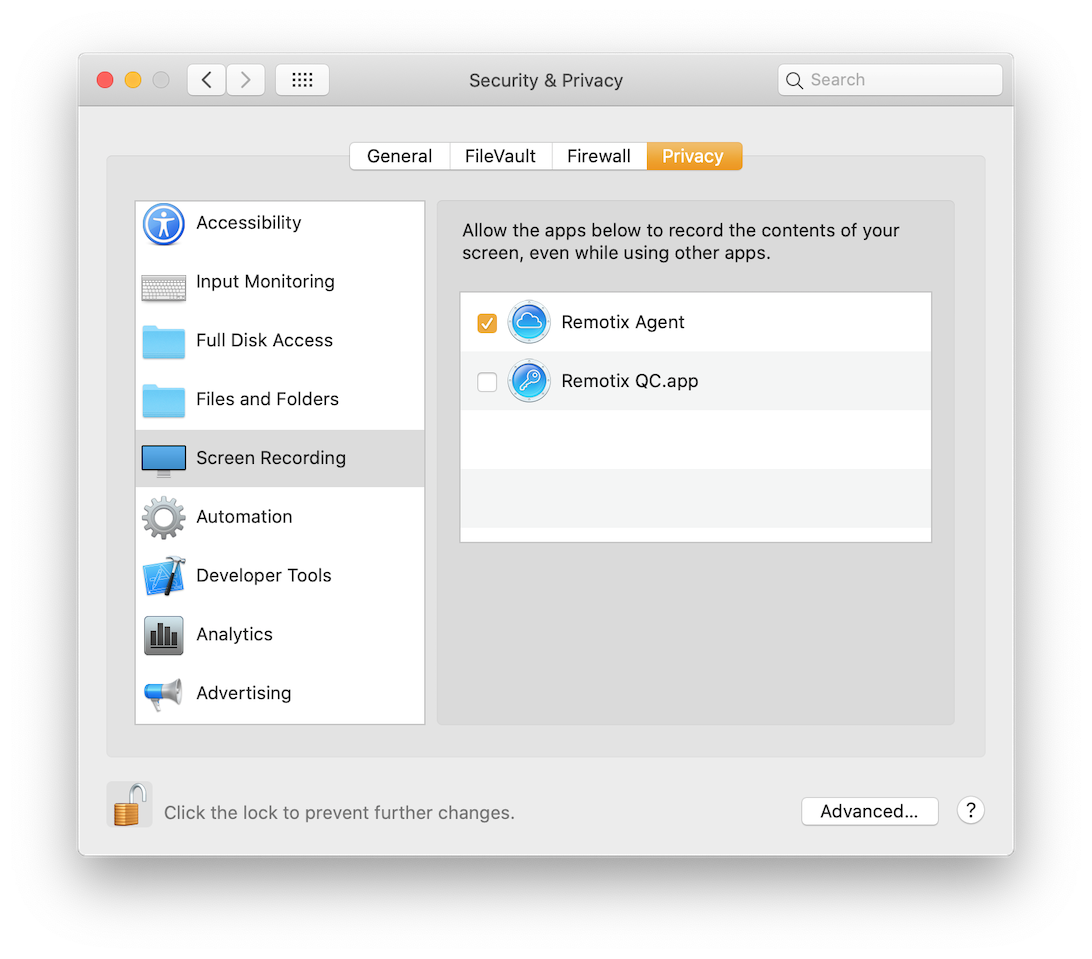
3. This will open the Security & Privacy > Privacy > Screen Recording in System Preferences app.
4. Put a check near the Remotix Agent icon to give it access:
5. That’s it. Now your Mac’s screen can be observed remotely.
If Remotix Agent don’t have the permission at the moment you try to access the Mac remotely, it will show the Screen Recording permission request dialog. Please note that these dialogs may be answered only by a local user. It will be impossible to click any buttons in the permission request dialog remotely.
Accessibility Permission
To make your Mac available to be not only observed, but controlled remotely with NEAR, do as follows:
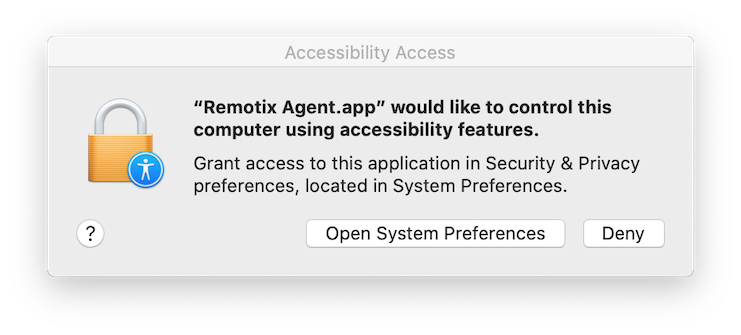
- In an opened window, click the «Request Accessibility Permission» button that will open a system dialog.
- In the Accessibility Access dialog, click the «Open System Preferences» button:
3. This will open the Security & Privacy > Privacy > Accessibility in System Preferences app.
4. Click the Lock icon in the bottom-left corner of the window so that it changes to an unlocked one. The system will ask you for an administrator password to make changes.
5. Put a check near the Remotix Agent icon to give it access:
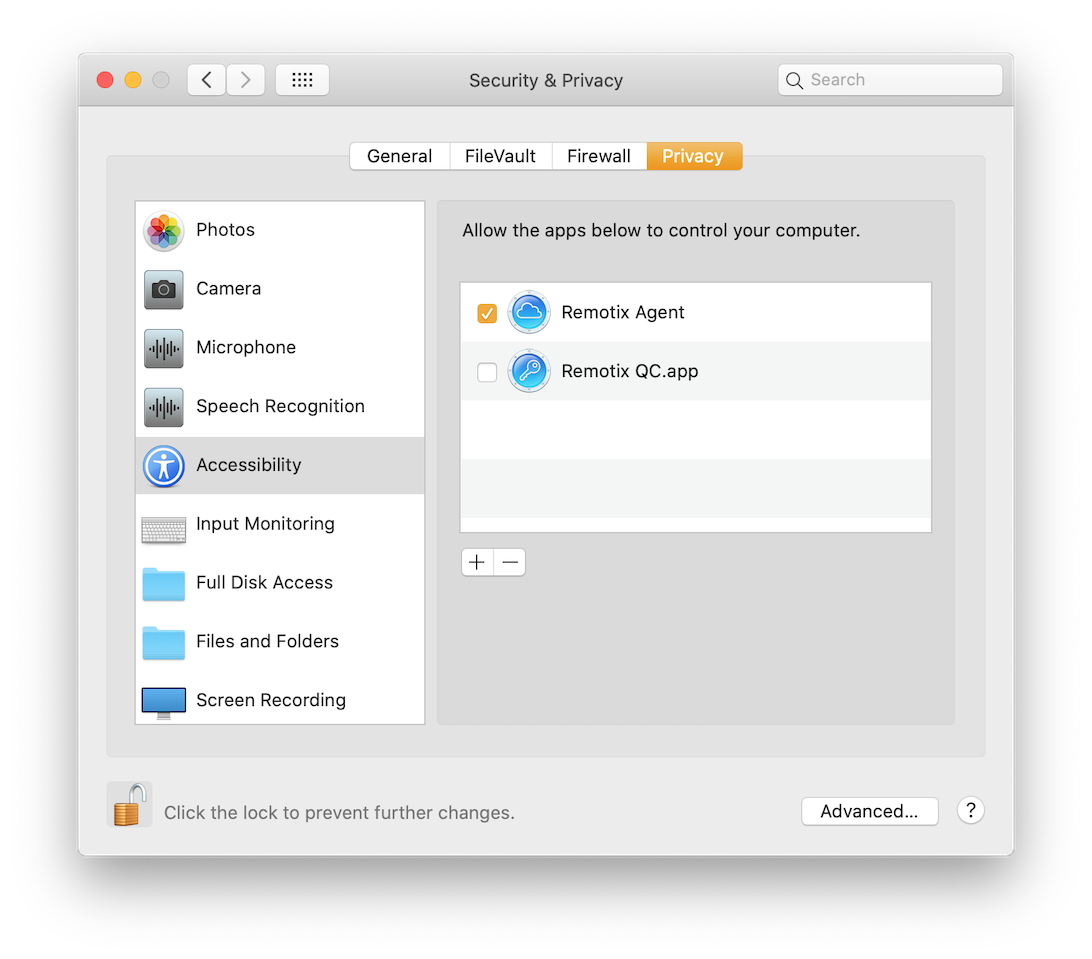
6. Now your Mac can be controlled remotely with NEAR.
Microphone Permission
To make your Mac able to redirect its sound to Remotix Agent for NEAR connections, do as follows:
- In an opened window, click the «Request Microphone Permission» button that will open a system dialog.
- Click «OK» to give Remotix Agent the required permission:

3. Now Remotix Agent is added to the Microphone section in Security & Privacy > Privacy in System Preferences so it is able to capture the sound.
Please mind that you’ll also need a sound capture driver to be installed on this Mac to let Remotix Agent utilize the given permission and get the sound of your Mac redirected.
Full Disk Access Permission
Besides remote control capabilities, Remotix Agent also provides a File Transfer protocol. If you want to be able to get all files from this Mac unattendendly, including files from users home folders and system ones, do as follows:
- In an opened window, click the Full Disk Access button that will open a system dialog.
- This will open the Security & Privacy > Privacy > Full Disk Access in the System Preferences app.
- Click the Lock icon in the bottom-left corner of the window so that it changes to an unlocked one. The system will ask you for an administrator password to make changes.
- Put a check near the Remotix Agent icon to give it access:
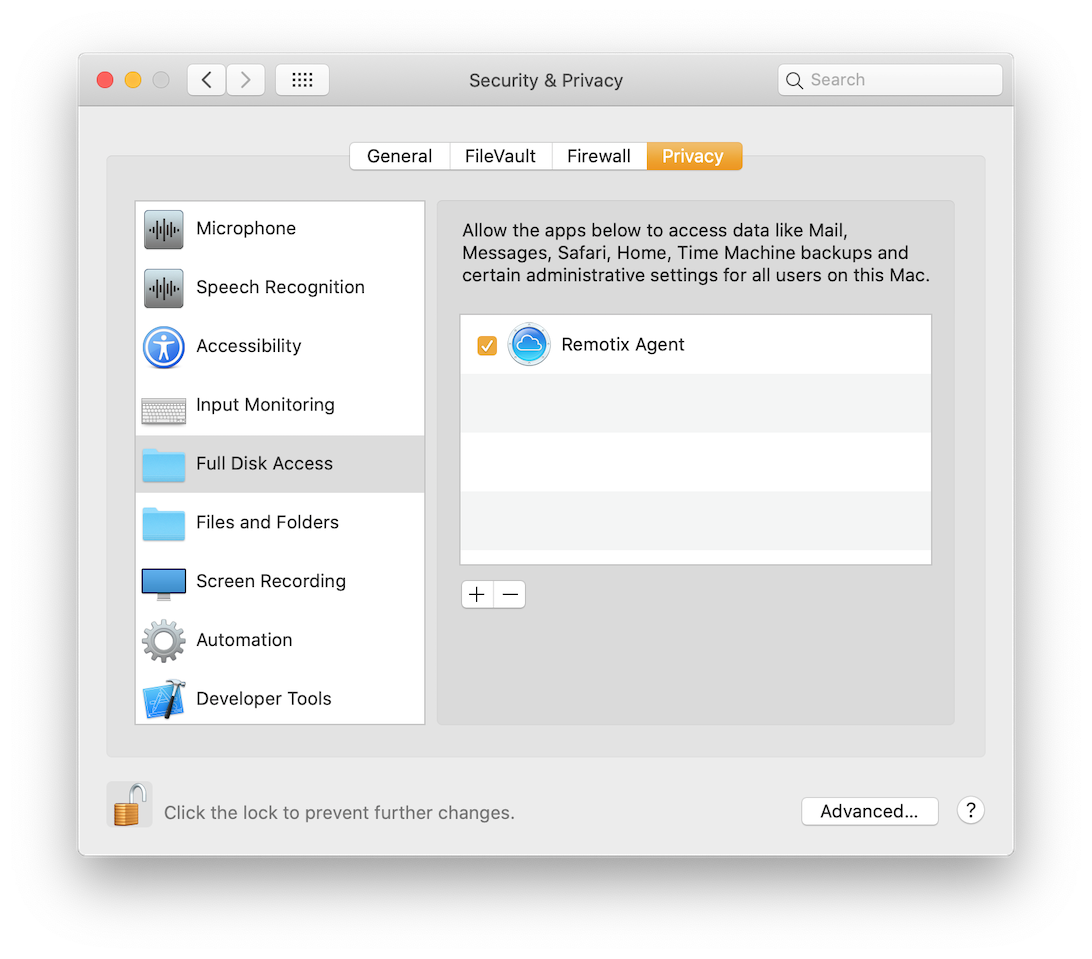
5. If there is no Remotix Agent application in the list, click the «+» button below to add it. By default, the app should be located in \Applications\Remotix Agent.
6. Now you’re good to go!
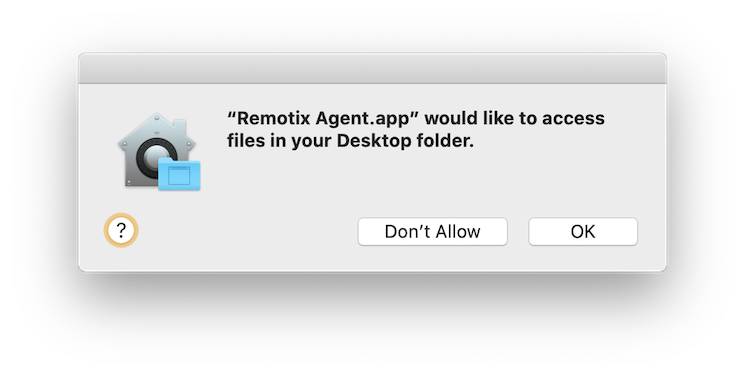
Note that if you decide not to grant Full Disk Access to Remotix Agent, any attempt to access user files remotely will halt until a local user accepts the file transfer request:
Change Your Mind
If you have previously denied to grant the permissions, macOS won’t let Remotix Agent ask you about it again. However, if you ever change your mind, you can do it manually as described below.
- Open the right section of System Preferences:
- Open System Preferences app.
- Go to Privacy tab in Security & Privacy > pane.

2. Select the corresponding section in the sidebar to the left:
- Screen Recording for remote screen access,
- Accessibility for remote control,
- Microphone for remote sound,
- Full Disk Access for file transfer
3. Click the Lock icon in the bottom left corner of the window if needed to make changes.
4. Put a check near the Remotix Agent icon to give it access:
5. Done.