Overview
Introduction
Remotix is a powerful yet simple client for remote access. You can connect to your computer from anywhere with almost zero lag via NEAR protocol.
Remotix supports:
- NEAR – Remotix’s own low-latency protocol
- Remote Desktop Protocol (RDP)
- Apple Screen Sharing
- Virtual Network Computing (VNC)
It allows you to connect to any remote desktop running any operating system from your Android device.
Main Screen
Remotix Account
Register at remotix.com to get a Remotix Cloud account and connect to remote machines using NEAR, and store and synchronize your remote connections and credentials across all devices.
When logged in, this pane displays your account information page and notifications from Remotix Hub.
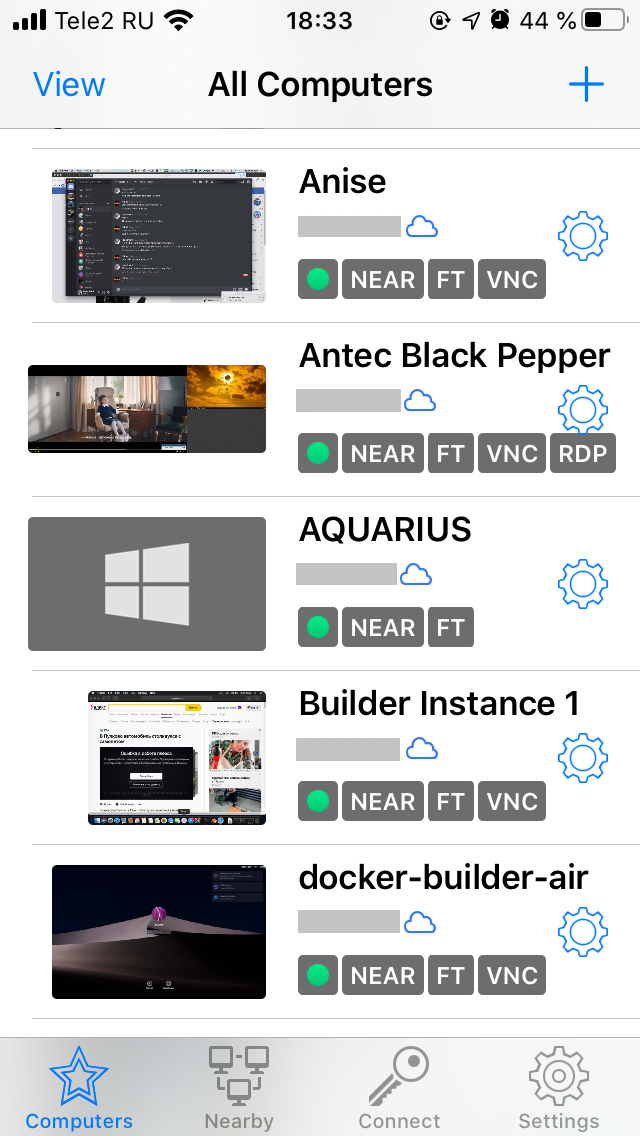
Stored Computers
Remotix Stored Computers screen presents a list of stored connections available to open.
When you connect to a nearby computer for the first time, you need to choose authentication type. When you disconnect, this computer gets added to the Stored list. All settings that you’ve selected or changed on-the-fly, will be stored. A star icon to the right of the connection name indicates that you have this connection in the Stored list.
Connections that you have never visited before have a default “blank” thumbnail and no stored settings.
To add a connection manually:
- Press [+] button.
- Choose the type of a new connection.
- Type in the address (Computer ID for NEAR, and hostname or IP for VNC or RDP). Other fields are optional.
- If you leave the Port field blank, Remotix will use the default value (5900 for VNC and 3389 for RDP).
- When you finish, the new connection will appear in the Stored list with a blank thumbnail.
- When you disconnect after a successful connection, Remotix saves the remote screen as a thumbnail to help you recognize it later. The thumbnail gets refreshed at the end of every session. To disable thumbnail saving, set “Store thumbnail” option to Off.
Nearby
Remotix uses Bonjour and LAN scanners to discover nearby computers available to connect.
- Bonjour: nearby servers on the local subnet that announce themselves using Bonjour technology.
- LAN: IP address/port scan of all computers available on the Wi-Fi interface.
Quick Connect
You may quickly connect to a remote machine running Remotix Agent or Remotix QC using this pane.
- To establish a connection, type in the Computer ID and Access Code shown in the Remotix Agent on the remote computer.
Application Settings
1. Computer list settings
- Sort mode
Choose how to sort your stored connections: by name, address or online status.
2. Remotix Account
- Remotix Account (iPhone only) - login with your Remotix account to get access to all of your machines and set up connection and credential sync.
- Synchronization - select whether you want your connections and credentials stored only locally on the current device or synchronized across all devices with the same Remotix account.
- Upload session info to Cloud - If set, Remotix will upload session info (protocol, duration and direction) to the Cloud automatically.
3. Security
- Master Password - turn on if you want Remotix to ask your device passcode, Touch ID or Face ID every time you start the application.
- Curtain Mode on Mac Connections - turn on if you want the screen to be automatically locked when you connect to remote Mac either via NEAR or Screen Sharing.
4. Connection
- Auto Reconnect - enables or disables automatic connection setup after disconnection, for example when you answer the call on your iPhone or switch to the other app on iPad.
- Show hidden files in file transfer. Choose whether you want to see and transfer hidden and system files in the File Transfer dialog.
- Offer saving credentials by default. If set, Remotix will offer saving credentials by default.
- Synchronize Clipboard by default
If set, Remotix would perform automatic clipboard synchronization if server supports it. If you copy something into the pasteboard on iOS device, Remotix sends it to the server. The opposite is also true - copying on server would automatically transfer clipboard contents to iOS device. Supported types include text and images.
5. Network
Use SOCKS-proxy. If set, you can set up custom SOCKS-proxy.