Connection
Viewer
When you connect to a computer, Remotix Viewer screen shows the remote desktop.
NOTE: If you connect using “Ask for observe” option, the connection opens in the Observe mode so you cannot control or otherwise interact with the remote computer.
1. Gestures
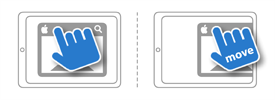
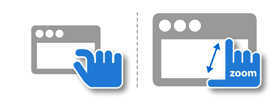
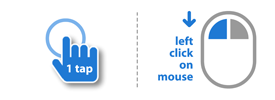
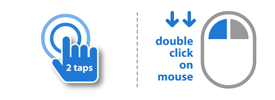
Remotix supports multitouch gestures for the following actions:
- pan
- zoom
- click
- double click
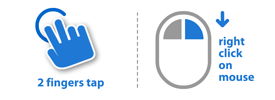
- right click
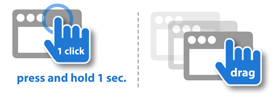
- drag
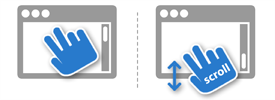
- scroll: move two fingers in the same direction to scroll. Vertical scroll is available on all kinds of connection. Horizontal scroll works on NEAR and Screen Sharing.
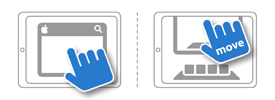
- show the hiding Dock or taskbar: pan the screen in the opposite direction.
2. Toolbar
Remotix toolbar contains the most useful buttons to manage your connection and to control the server.
Representation of options on the toolbar is depended of width of your screen in current device orientation. To see all use landscape orientation.
- Keyboards
Remotix allows you to use two keyboards: standard Android keyboard and extended one. Extended keyboard provides you with keys that you usually cannot access through standard Android keyboard, such as F1-F10, Escape and cursor keys. Special buttons for actions like "Cut", "Copy" and "Paste" are also included. - Right & middle click mode
This button will imitate right mouse click or middle click instead of left one while it is selected. It won't be released until you do tap (e.g. panning gesture won't cause it to release). - Touchpad mode
Touchpad mode button (the hand) will switch the way you control Remotix viewer. In this mode, your finger movements would move the cursor over the screen and tapping on the screen would actually tap at the position of the cursor. You can continue to use gestures like two finger scroll to perform scrolling and two finger click to perform the right click. - Modifiers
Modifier keys (⌃, ⌥, ⌘ / Ctrl, Alt, Win) are put on the toolbar. Once you press a modifier button, it stays pressed until released.
E.g.: to close a browser tab, first you press the modifier (⌘ or Ctrl), then 'T', then modifier again.
Note: if width of your screen is insufficient, modifiers buttons can be hidden. In that case try another orientation of your device. - Cursor keys
If width of your screen in current device orientation is enough - the cursor keys (←, ↓, ↑, →) are also present on the toolbar.
3. Settings menu
(options are depended of connection type)
Press settings menu button to get access to full screen mode, zoom pixel to pixel or to change connection settings on the fly.
- Disconnect
select disconnect to terminate connection to current server - Take Screenshot
Takes the screenshot of the remote machine and allows you to share it. - Zoom 1:1
would zoom the current screen to pixel-to-pixel ratio. - Fullscreen Mode
hides the toolbar. To get access to toolbar press "Back" button. - Show Connection Info
Displays HUD with connection information like rate, bandwidth and time connected. - Lock remote screen (Apple Screen Sharing only)
Blacks out the physical screen on the machine you're connected to, preventing the others to see your actions on it.
3.1. Connection settings:
- Display Resolution
Select the resolution of the remote session. - Quality
Select the quality depending on your current workflow. Smooth is the best for games or video playback. It uses hardware-accelerated H.264 to encode the remote desktop. Sharp gives you the best quality picture at the sacrifice of frames per second. Balanced (the default) is optimized for the general use. - Hide or Always Show Local Cursor
If the remote machine displays cursor as part of the remote screen you can disable or always enable the local cursor rendering. - Synchronize Clipboard
If set, Remotix would perform automatic clipboard synchronization if server supports it. If you copy something into the pasteboard on device, Remotix sends it to the server. The opposite is also true - copying on server would automatically transfer clipboard contents to device. Supported types include text and images . If remote server does not support automatic clipboard synchronization (notable example is old version of Apple Screen Sharing server), you can use "Send clipboard" and "Get clipboard" actions, whose would appear in Settings menu to transfer pasteboard to and from server.
3.2. Keyboard settings:
- Keyboard mode
In some verions of Android you may need to set exact input type in connection settings. Set "Keyboard type" to "Hardware" for external keyboard. - Keyboard type (RDP only)
Choose unicode or keycode keyboard input mode. - Keyboard layot (Apple Screen Sharing only)
3.3. Options for VNC servers:
- Preferred Encodings
You may choose the preferred graphical encodings used by Remotix for every server. If all encodings are turned off, the raw encoding will be used (which does not perform any compression and needs the widest bandwidth). - Color Depth
This option is only available if Adaptive codec is selected. You can adjust color depth of the Viewer screen. The higher the value - the greater the width of bandwidth used. You can get satisfying level of picture quality vs. performance adjusting this option, e.g. on GPRS connection or on older devices you need to set it on 8 or 16 bits. - Server Scaling
You can further improve performance of Remotix on zoomed out view by setting up this option. On the connect stage Remotix sends a command to server to send back downscaled image. This will reduce required bandwidth and free your device resources.
External Keyboard
Remotix fully supports the external keyboard, including all modifier keys, such as Shift, Command and Windows button.
In some verions of Android you may need to set exact input type in connection settings. Set "Keyboard type" to "Hardware" for external keyboard.
Tips and Tricks (ScreenSharing)
Dual-screen setup: you can choose whether you want to work with only one display of your multimonitor setup, or with all of them together, by choosing needed display in connection preferences on-the-fly.
Spaces navigation: to move between spaces on a Mac, use the Ctrl+Arrow keys shortcut (unless you have disabled it on your Mac).
File Transfer
You can use Remotix file transfer feature to move files from any of your computers to the mobile device and back. File transfer is part of NEAR protocol, so you need to install Remotix Agent on the computer you will be connecting to and enable file transfer in agent settings.
To start file transferring, tap on the computer in your list and select File Transfer. You’ll see a list of local and remote folders. Tap marker icon (or long press on a file), mark files you want to transfer, select the folder to transfer them and click the transfer icon in the lower right corner. File transfer will begin