3. Preconfiguration
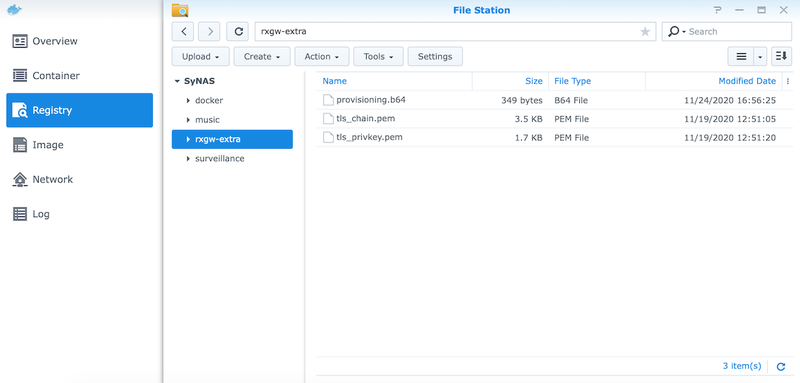
3.1 Necessary files
To install the solution, you need to open the folder created at #2.1 and put the following files there:
- provisioning.b64: a file containing the license information. Get one from our support team. If there is no such file, the backend won’t start.
- tls_chain.pem + tls_privkey.pem: a TLS certificate for HTTPS. If there are no such files, the server will work over HTTP instead of HTTPS.
Note that the chain file should contain the whole certificate chain. E.g., if you use Let’s Encrypt for certificate generation, you should rename itsprivkey.pemintotls_privkey.pemand itsfullchain.pemtotls_chain.pem.
On the screenshot, the shared folder is named rxgw-extra.
3.2 Container configuration
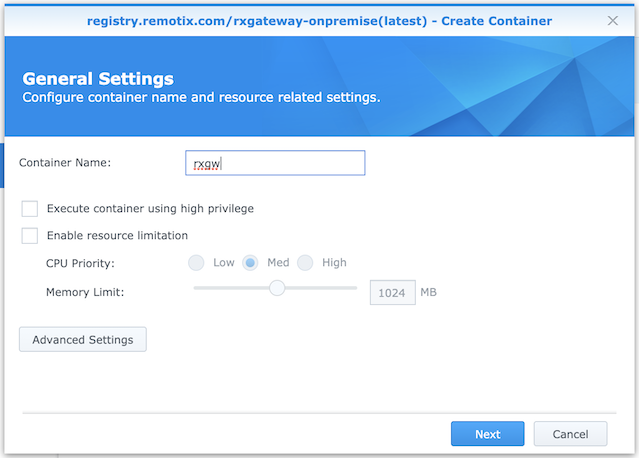
3.2.1 Create a container
- Open Docker app,
- Choose Image pane to the left,
- Select rxgateway-onpremise:latest image and click Launch.
- Enter container name, e.g., rxgw,
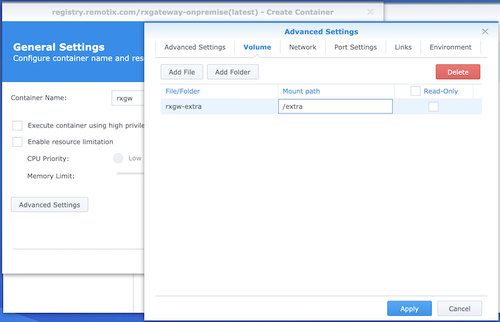
3.2.2 Mount the folder containing extra files
- Click the Advanced Settings button.
- In the Advanced Settings, choose the Volume tab and add the rxgw-extra folder there:
- Click the Add Folder button,
- Find and choose the rxgw-extra folder,
- Click Select,
- In the Mount path field, enter
/extra, - Click Apply.
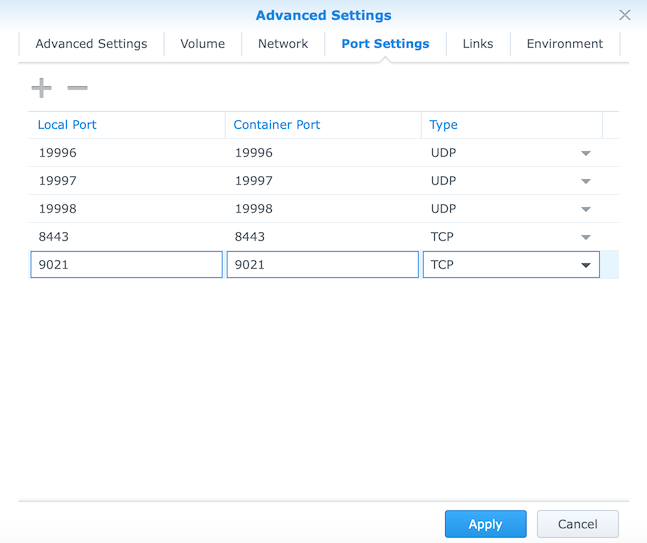
3.2.3 Open necessary ports
- Choose the Port Settings tab,
- Map all container ports listed there to the same local ports, as shown on the screenshot.
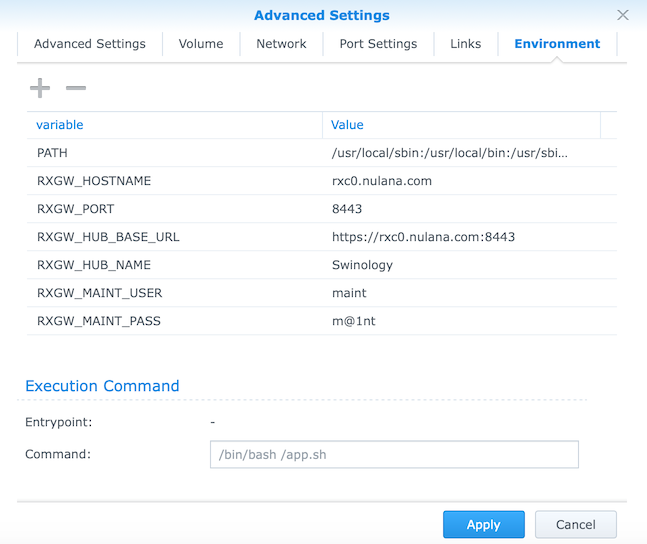
3.2.4 Set the environment variables
- Choose the Environment tab,
- Set the following parameters:
- RXGW_ADDRESS: the URL of your future Remotix server,
- RXGW_PORT: the unified port to access Remotix server (8443 by default),
- RXGW_BASE_URL: the full URL of your Remotix server, including HTTP/HTTPS and port,
- RXGW_HUB_NAME: name of your Remotix server to be shown in Remotix Hub,
- RXGW_MAINT_USER: username to access Remotix server's maintenance page,
- RXGW_MAINT_PASS: password to access Remotix server's maintenance page,
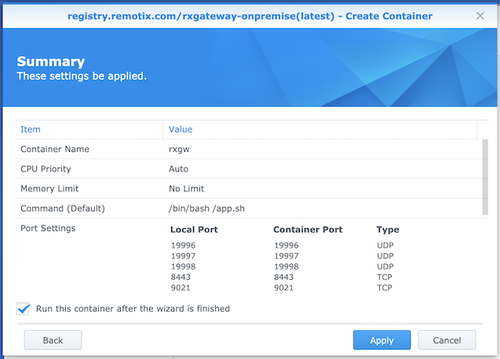
3.2.5 Finish container creation
- Click the Apply button,
- On the General Settings page of the wizard, click Next,
- On the Summary page of the wizard, review the final configuration and make sure that everything is correct,
- Make sure that the “Run this container after the wizard is finished” option is on,
- Click Apply.
Now you should have the container up and running.
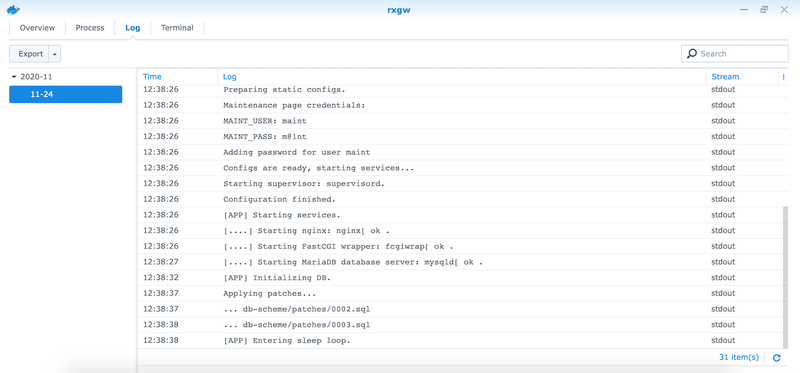
To check its status:
- Open Docker app,
- Choose Container pane to the left,
- Select your Remotix container (“rxgw” here),
- Click the Details button,
- Open Log tab.
If you see the Configs are ready, starting services... line in the log and the last line of the log says [APP] Entering sleep loop, the Remotix solution has been launched successfully.
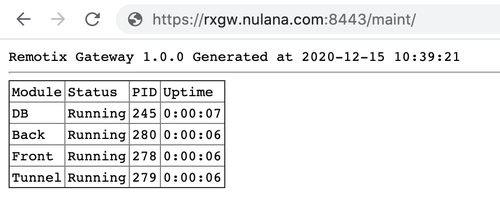
You can also open the maintenance page and check what it says, too. The URL is your RXGW_BASE_URL/maint. For settings shown on the screens above, it is https://rxc0.nulana.com:8443/maint.
The status of all four modules (DB, Back, Front, and Tunnel) should be “Running.” If it is not, please check #5 Troubleshooting.
3.3 Adding admin user
To finish the setup and make your local copy of the Remotix Hub usable, you need to add the first administrator to the Hub:
- Open the maintenance page (RXGW_BASE_URL/maint/),
- Scroll down to the “Admin users” section,
- Click Add new admin user,
- Enter the username and password for the new user,
- Click Add.

Congratulations! Now your instance of Remotix server is good to go. The next step is to set client and agent apps to use it.